Users
Section overview
Users is a core section that provides an overview of all registered users in the system. The section allows to create, edit, and disable existing users. The list of users is presented in the form of a table with the following columns:

| Column name | Description |
|---|---|
| Status | User's status. Depending on the icon, the status can be either active, deleted or archived |
| Login | User's account name |
| Supervisor identification | S indicates that a User is a Supervisor (has access to Clients, Rate Tables, and Routing Plans of the Company, regardless of the User who owns them) |
| Reseller | Name of a company whom this user belongs to |
| Full Name | Mailto links of users (if specified in the user's account) |
| Role | User's role that determines the access level or permissions |
Functional buttons/icons, presented in the section, are as follows:
| Button/Icon | Description |
|---|---|
 | Allows creating a new user |
| Allows accessing this user's Clients | |
| Allows accessing this user's Rate Tables | |
 | Allows archiving a user |
Advanced search
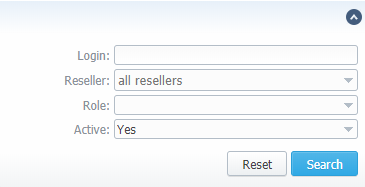
In the top right corner of the section above the table, an advanced search drop-down menu is located. By default, the list of clients is filtered by "Active" status. By clicking on a red downwards arrow icon, a drop-down menu with the following structure is displayed:

| Field | Description |
|---|---|
| Login | Specify a desired user's login |
| Reseller | Select from the list of all Resellers and Sub-resellers registered in the system |
| Role | Select from the list of existing system roles |
| Active | Specify whether the user's status is active or not, by selecting from a drop-down list: "Yes", "No", "Empty" (to display users with both statuses) |
Adding a new User
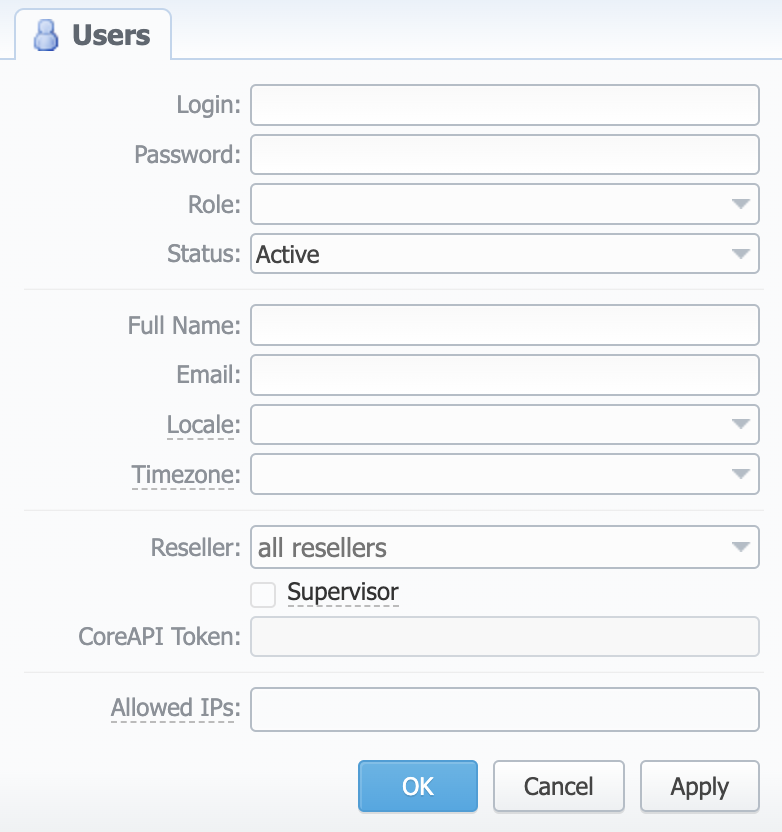
To create a new user, you need to:
- Click the New User button
- In the opened pop-up window, fill in all the required fields
- Confirm new user creation by clicking "OK"

| Field | Description |
|---|---|
| Login | Specify a user's login |
| Password | Define a password |
| Role | Select a role for a user from a drop-down list |
| Status | Check if you need to prevent a user temporary from having access to the system. The statuses are: "Active", "Blocked", "Archive" |
| Full Name | Enter a user's name. Note that if a user's email is specified, full name in the section serves as a mailto link |
| Specify a user's email | |
| Locale | Define a language for a user, and it will be used instead of the system one for displaying all dates, reports, etc. If not specified, the system settings are taken |
| Timezone | Define a timezone for a user, and it will be used instead of the system one for displaying all dates, reports, etc. If not specified, the system settings are taken |
| Reseller | Specify a reseller, sub-reseller or manager a user belongs to |
| Supervisor checkbox | Tick to make this user a Supervisor |
| CoreAPI Token | This field cannot be specified in the creation form. CoreAPI Token is automatically generated by the system after a user is created |
| Allowed IPs | Enter IPs or subnets, one record per line, i.e. the user will have access to the system only if he/she logs in via specified IPs |
While creating a new user, bear in mind the following things:
- Each user can have only one assigned role
- Avoid using non-Latin characters in users' logins/passwords
- Non-limited Users (a.k.a. admins) see everything in the system.
- Supervisor Users see their company-related data and of any companies below.
- Users allocated under specific companies (not Supervisors) - see only their company-related data.
Archiving a User
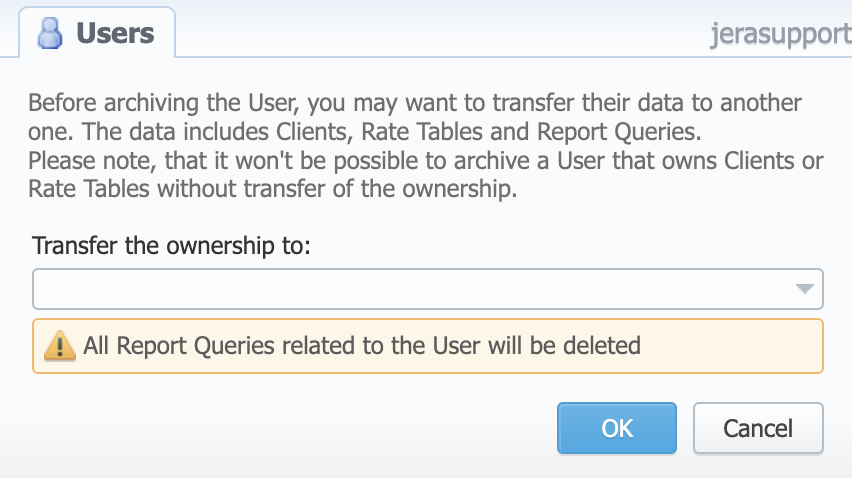
If you want to archive a User, click the delete button. The following window will open, where you will be able to transfer Clients, Rate Tables, and Report Queries ownership to another User:

Archiving of a User is possible only to their reseller's supervisors, parent reseller's supervisors, and admins (users not limited by a reseller).