Report Queries
Report Queries list
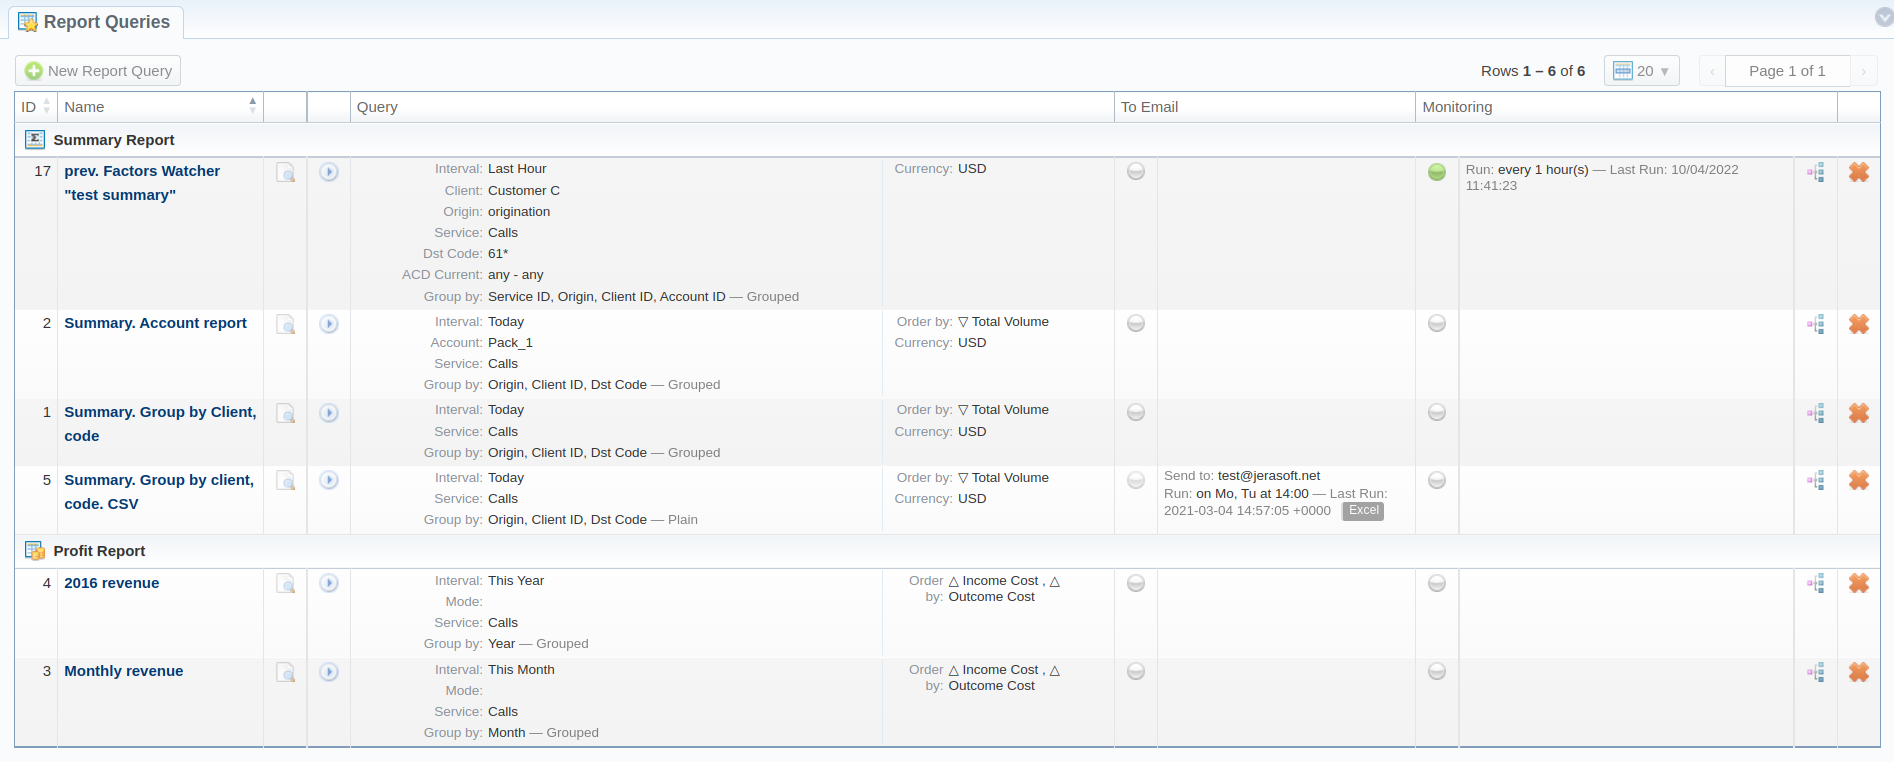
This section allows you to view, execute and manage the Report Queries of Active Sessions, Balance Report, Customer Dynamics, Invoicing Report, LCR Lists, Orig-Term Report, Profit Report, Rates Analysis, Routing Analysis, Summary Report, and xDRs List. Moreover, you can send reports by email to keep yourself informed about the traffic status without the need to log in to the system and query reports. The section structure is as follows:
| Column | Description |
|---|---|
| ID | Query ID |
| Name | Name of the query |
| Query | Query details |
| To Email | Tool to run a report automatically at the exact time and send the results to the list of emails |
| Monitoring | Tool to be used for Traffic Processing and/or notifications per the given schedule |
The section contains the following functional icons:
| Icon | Description |
|---|---|
 | Allows creating a new report query |
 | Allows previewing a query |
 | Allows running a respective report by this query |
 | Indicates that sending a report via email/monitoring option is enabled. You can enable/disable the rule after it's been created in the system by clicking the indication icon. |
 | Indicates that sending a report via email/monitoring option is disabled. |
| Prompts to the Traffic Processing rules created by matching factors in a query | |
 | Allows deleting a query |
To start managing, choose the respective query from the section and click on the name to open the settings.
Creating a Report Query
You can create a report query either using a "New Report Query" button in the main section or from the respective sections while generating reports. If you are adding a new query from the report section, you need to:
- Open the target Report section
- Fill in a query form with respective parameters
- Click the "Save Query" button
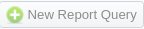
- In a pop-up window with template settings, fill in all required fields (screenshot and field description is provided down below)
- Click "Apply" to save a template
| Information Block | Description |
|---|---|
| Name | Specify the name of the template |
| Visibility | It allows controlling the visibility of respective reports templates whether you want to keep templates private or leave them visible for other users: Public - available for all users of the same Reseller and Private - accessible strictly for the creator. |
| Report | Here, a report type will be prefilled. |
| Filters / Output | Here you need to specify filters that will be used for generating a correct report and choose the output type to view the report |
To Email tab
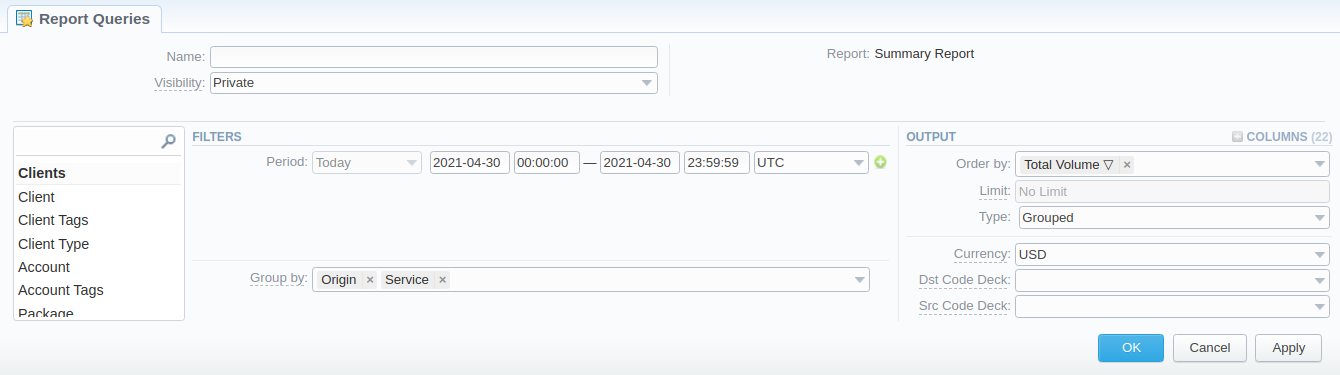
After creating the Query, you can manage whether to allow generating reports at the specific times and send results to specified emails. For this, open the needed Report Query, and click the "To Email" tab:
General
- Status: Specify if this function is on: Enabled or Disabled
- Output Type: Specify a file type to be sent: CSV or Excel
Recipients
- Users: Define system Users to send a Query to (can be empty if the Extra Emails field is filled in)
- Extra Emails: Specify the needed extra email addresses (can be empty if the Users field is filled in)
Scheduling
- Type: Report generation scheduling approach: fixed (run at specific times/days); periodic (run at certain intervals).
Fixed
-
Timezone: Indicate a timezone for a selected report run time
-
Add Time button:
-
Time - specify the time;
-
Days of the Week - specify the needed frequency (Daily, Weekdays, Weekends, Custom);
-
Specific days - becomes active if Custom is selected as a Days of the Week parameter. Specify exact days here.
tipIf you want to receive reports for a previous month every 1st day of the next month, you will need to:
-
set Last Month as an Interval in the Query
-
set First Run in the To Email as the first day of the month
The report will be queried for the previous interval and be sent to the respective email/-s on the first day of each month.
-
-
-
Last Run: Indicates when the report was last run by the system
Periodic
- Every: Determine an appropriate interval to generate a report automatically, it could be in minutes, hours, days, weeks, months, or years. Please note that only Balance Report to Email is available for previous/current year period.
- First Run: Offset a specific date & time up to a second (incl. a timezone) for the first run of a report
- Last Run: Indicates when the report was last run by the system
If you create the report query and the To Email option is enabled, the client will receive the file with a report even when there are no statistics for a specified period.
Monitoring tab
After creating the Query, you can manage whether to monitor statistics and generate alerts, as well as block numbers, codes/code names, destinations, clients, or accounts if set conditions are met. For this, open the needed Report Query, and click the Monitoring tab:
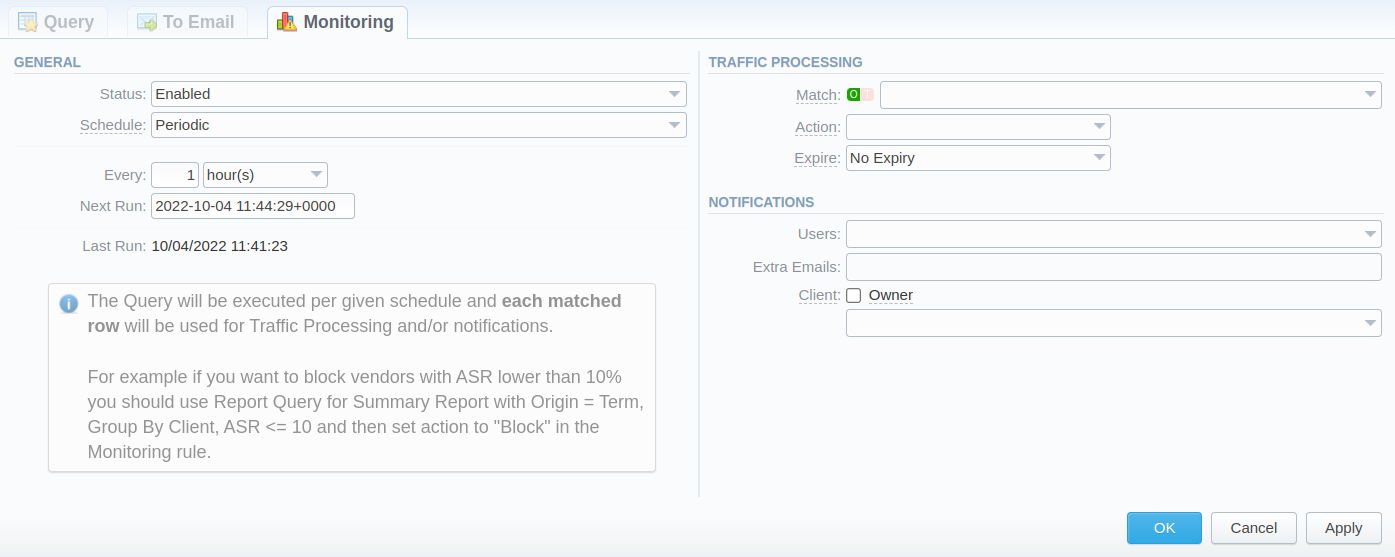
General
- Status: Specify if this function is on: Enabled or Disabled
- Schedule: Query execution scheduling approach: fixed (run at specific times/days); periodic (run at certain intervals)
Fixed
-
Timezone: Indicate a timezone for a selected query run time
-
Add Time button:
-
Time - specify the time;
-
Days of the Week - specify the needed frequency (Daily, Weekdays, Weekends, Custom);
-
Specific days - becomes active if Custom is selected as a Days of the Week parameter. Specify exact days here.
tipIf you want to receive reports for a previous month every 1st day of the next month, you will need to:
-
set Last Month as an Interval in the Query
-
set First Run in the To Email as the first day of the month
The report will be queried for the previous interval and be sent to the respective email/-s on the first day of each month.
-
-
-
Last Run: Indicates when the report was last run by the system
Periodic
- Every: Determine an appropriate interval to generate a report automatically, it could be in minutes, hours, days, weeks, or years.
- Next Run: Offset a specific date & time up to a second (incl. a timezone) for the first run of a report
- Last Run: Indicates when the report was last run by the system
Traffic Processing
-
Match: Here you can specify Report fields to build Traffic Processing Rules.
tipFor example, if you want to block only an Account, you should select "Account ID". Meanwhile, having only "Client ID" will block the whole Client.'
-
Action: What the produced Traffic Processing Rules should do:
- Block - the Rules should block events matching them;
- Add Tags - the Rules should add specific Tags to events matching them.
-
Expire: When the produced Traffic Processing Rules should expire:
-
No Expiry - the Rules shouldn't have an Expiry Date;
-
After - the Rules should expire after a fixed interval after their creation;
-
By Payment Terms - the Rules should expire at the end of the current period of Client Payment Terms.
noteExpiry by Payment Terms is possible only with matched Client or Account.
-
Notifications
- Users: Define system Users to send a notification to (can be empty if the Extra Emails field is filled in)
- Extra Emails: Specify the needed extra email addresses (can be empty if the Users field is filled in)
- Client checkbox: In case of blocking a Client or its Account, we can email the client (using Reports Monitoring - External Mail Template) or their owner (using Reports Monitoring - Internal Mail Template). You can also specify the Client's email from their settings in this field:
- Main Email
- NOC Email
- Billing Email
- Rates Email