Setting up Rates Notifications by email
With the Rates Notification tool, you can manually or automatically notify your Clients about Rate changes.
When a Rate update occurs, the JeraSoft Billing System creates a notification message that contains an attached file with rates and sends it to recipients. The content of the message depends on your configurations in the system.
File naming
The current file name format for Rates Notification is as follows:
rates-export_type-company- for-client/account-tech_prefix-time_profile-date_time.ext
where:
export_type- "all" or "changed"company- Company Nameclient/account- Account name (if only one of all Accounts of the Client uses this Rate Table) or Client nametech_prefix- Account's tech prefix (this parameter is present only if column "Tech Prefix" is selected in the list of columns in the Rates Notification template)time_profile- Time profile namedate- Date of notificationtime- Time of notificationext- file extension (.csv or .xlsx)
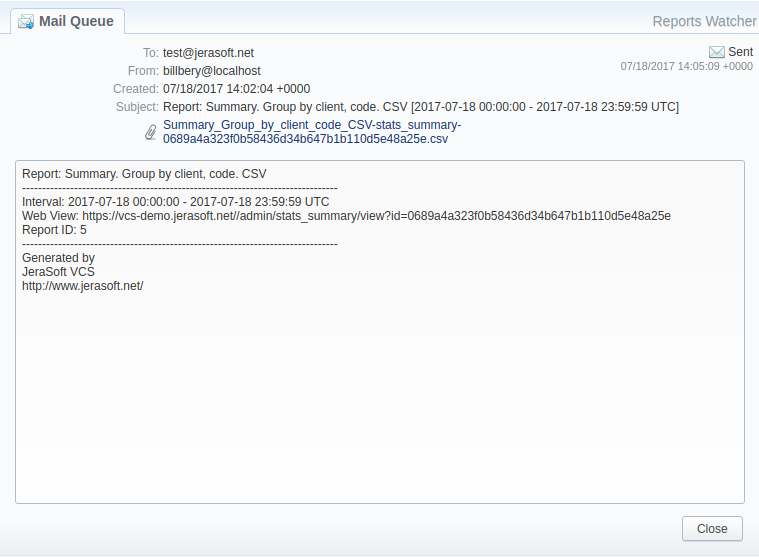
You can view a notification message in the Mail Queue section.
Automatic email notification
Automatic Rates Notification tool allows sending a preconfigured notice about rate changes. For example, if there are some actual changes, for instance, updating of Client's Rate Table, system will automatically generate and send a notice with changes via email to a target customer (i.e. which rates were increased/decreased/closed).
Follow these steps to configure notifications:
-
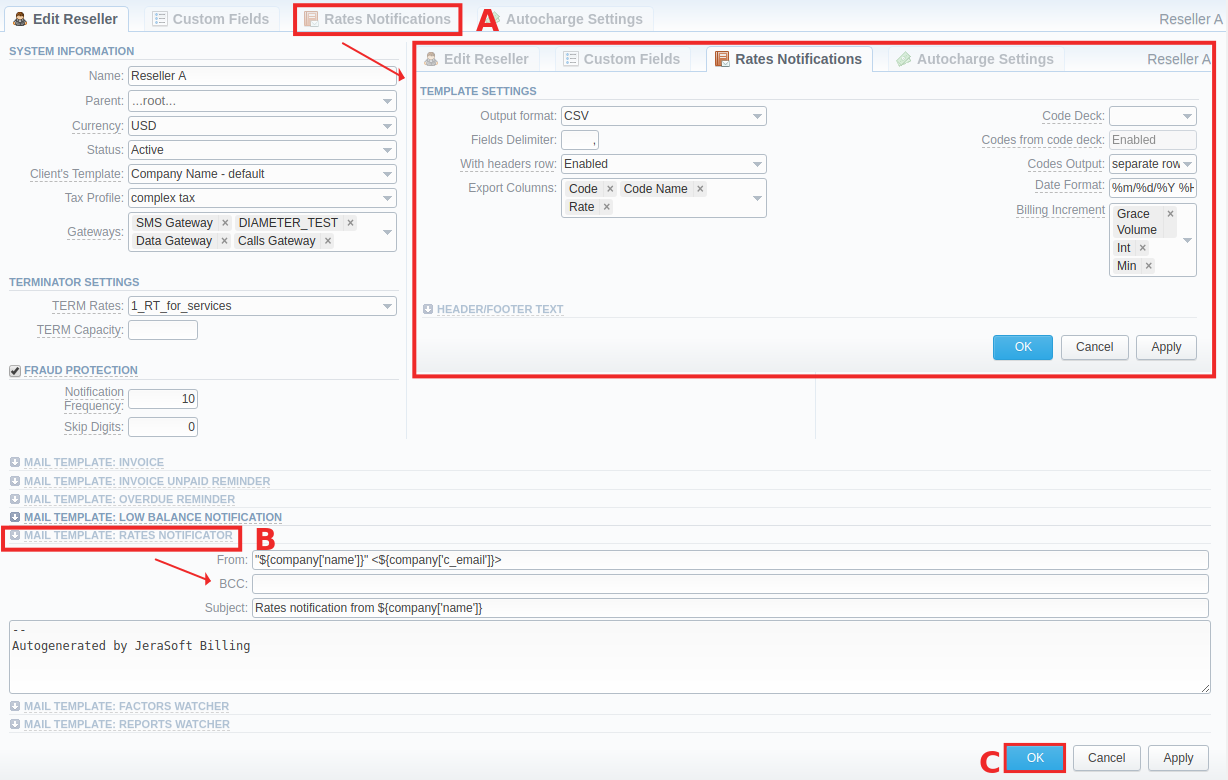
Go to the Management → Resellers section and open a target Reseller Settings (for example: Reseller 1):
-
Go to Rates Notifications tab and set values for a notification template according to your needs: date, format, columns, header/footer text.
-
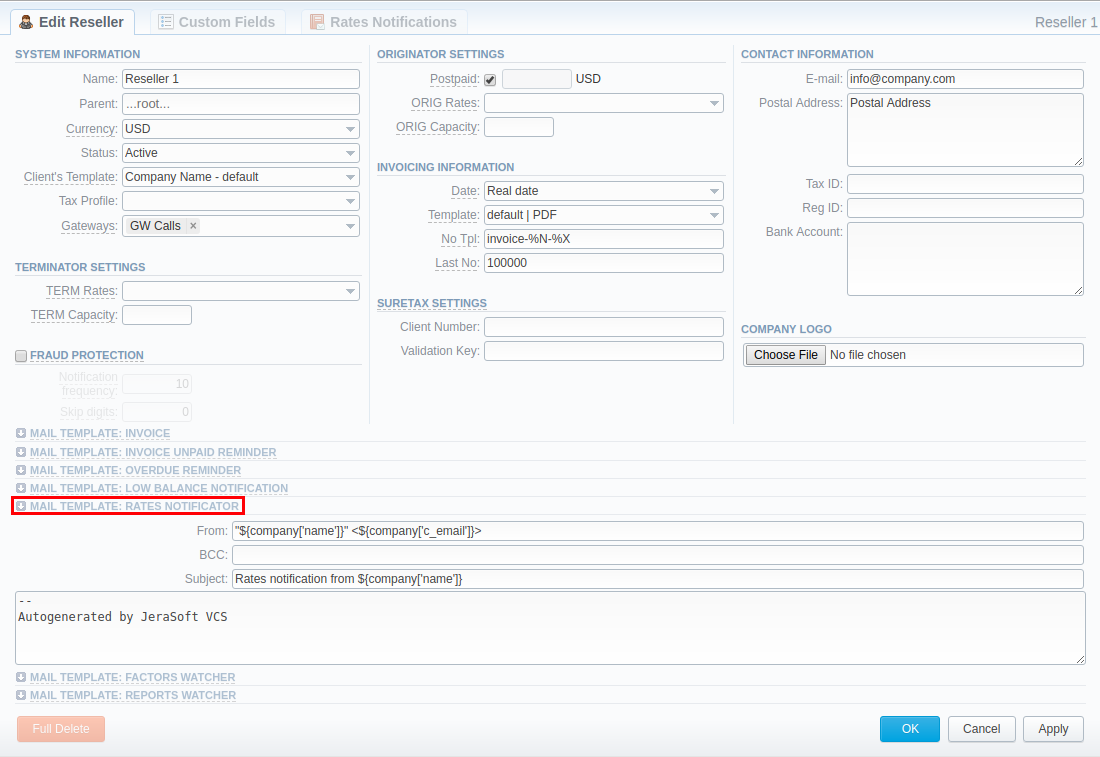
Customize a template in the Mail Template: Rate Notificator of Edit Reseller tab. See details below: Create Rates Mail Template.
-
Confirm parameters for a respective reseller by clicking "OK".
-
-
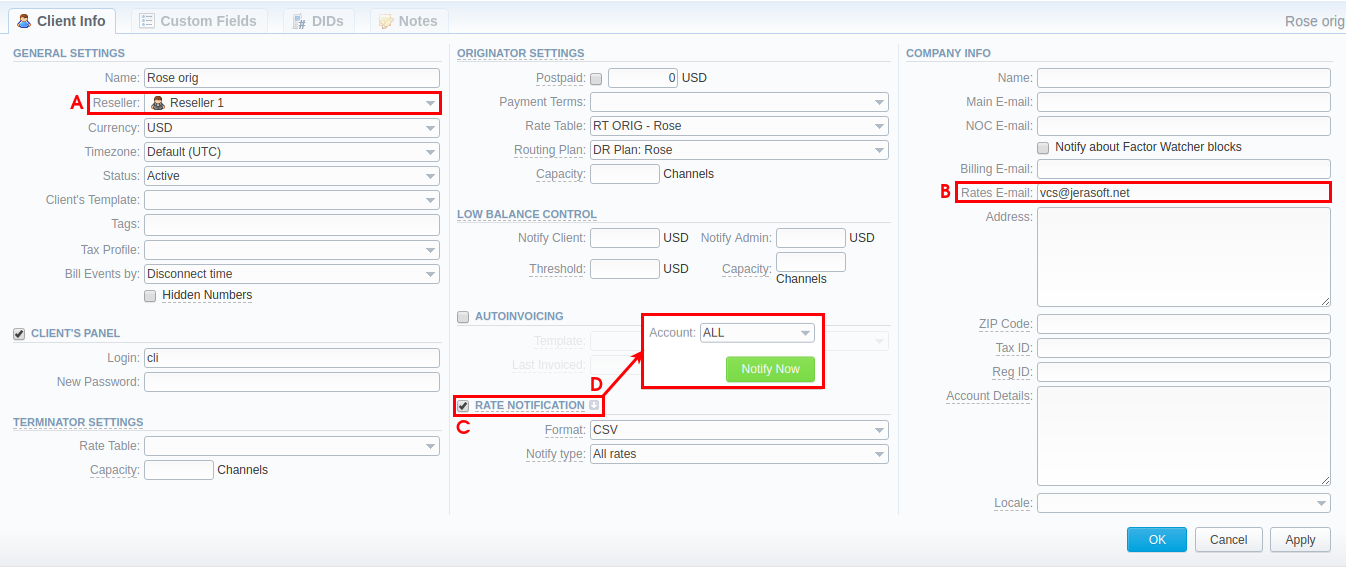
Go to the Management → Clients section and open target Client's settings (for example: Rose orig):
-
Specify a correct email address for Rates Notifications in the Rates E-mail field.
-
Assign this Client to our target Reseller (Reseller 1).
-
Enable the Rate Notification checkbox and specify the "Format" and "Notify Type" fields.
-
Then click on the "Downwards Arrow" icon next to the Rate Notification checkbox and select Client's Accounts.
-
Description of the Rate Notification information block
-
Rate Notification checkbox (here you can determine parameters of Rates Notifications for a current Client)
- Format: select an available format (.csv or .xls) of the attachment with Rate details
- Notify Type: specify whether a file that will be sent contains "all rates" or "only changed" ones.
- "All Rates" - file contains all rates including not changed ones.
- "Only Changed Rates" - file contains only changed rates.
- "All Rates - unique mode" - if there are two or more new rates with different effective dates for one code, several files will be sent and each will contain all unchanged rates and only one rate change for one code.
-
Manual notification parameters
Click on the "Downwards Arrow" icon next to the Rate Notification sub-panel to view settings. This icon will be visible after enabling the "Rate Notification" check box and applying changes.
- Account: select a respective Account that belongs to this Client or choose "ALL" accounts.
- "Notify Now" button: click this button to send a notification immediately.
Please note that the notification will be send to the Client right after the Rate Notificator service has run. By default, this service runs every 5 minutes. You can check these settings in the System → Task Scheduler section.
Create rates mail templates
Mail Templates allow you to personalize your communication with Clients and stop retyping the same email over and over again. Create a template for a target Reseller and his Clients, so you can send notifications in a matter of seconds.
To configure a Template for a Rate Notification, follow the next steps:
- Go to Resellers section and open a target Reseller's settings;
- Click on the Mail Template: Rate Notificator to expand the settings;
- Specify parameters "From", "BBC", "Subject", type the text and apply changes.
Description of rates mail template
- "From": indicate Company Name and its email
- "BCC": specify who will receive a blind copy of an email
- "Subject": name of the company that is used for the notification
Syntax for Mail Template: Rates Notificator
${msg['rt_name']}- Rate Table name${msg['lastedit_dt']}- Data when Rate Table was last time edited${date}- Data when the notification was sent
For more details about mail template configuration syntax, refer to the Resellers article.
How to set time for Rate Notificator?
Rate Notificator is activated when there are some actual changes in Origination Rate Table. Also, when new rate sheet was uploaded and you want your customers to receive a notification and rates lists after 3 hours of actual rate change in the system. Therefore, you need to do the following:
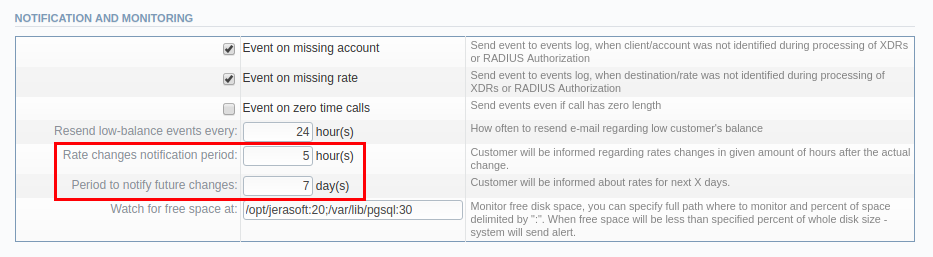
- Go to Configuration → Settings → Notification and monitoring information block;
- Find "Rate Changes Notification Period" field and specify a required time. Then, rate lists will be generated and sent to a respective Client at a determined time.
Moreover, you can specify the number of days when customer will be informed about rate change in advance. To activate this option, enter a target "Number of days" in the Period to notify future changes field.