xDR Disputes
Section overview
xDR Disputes Manager is a full-featured add-on of the system that could be used to compare xDRs given by your client/vendor with xDRs stored in the system.

| Column | Description |
|---|---|
| ID | ID of a dispute |
| Client/Account | Client and Accounts of a current dispute |
| Interval | Period of compared xDR files and timezone |
| Total Qty | Total amount of compared xDRs |
| No L | Number of xDRs that were not found in the system |
| No E | Number of xDRs that were not found in the external xDR file |
| Updated | Date of the last dispute update |
Functional buttons/icons, presented in the section, are as follows:
| Button/Icon | Description |
|---|---|
 | Allows adding a new dispute to the system |
 | Allows editing selected disputes |
 | Allows viewing dispute details |
 | Allows deleting a dispute from the system |
If the xDRs Disputes section is not displayed in your JeraSoft Billing, you need to enable it in the System → Roles section.
Creating a new dispute
The whole process can be divided into three steps.
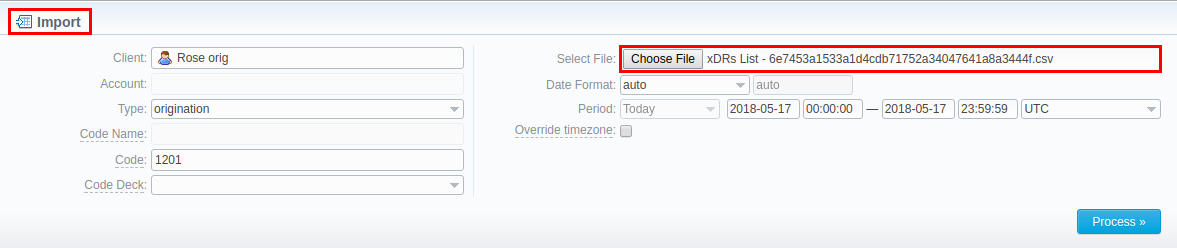
Step 1. Selecting a file and specifying parameters
To create a new dispute, click the Add new Dispute button. Then, you need to upload a target xDR file and specify the next information in the opened pop-up window:
| Field | Description |
|---|---|
| Client | Specify a client for the dispute. If indicated, the Account field is disabled (and vice versa) |
| Account | Specify an account for the dispute |
| Type | Choose the type of compared xDRs: origination or termination |
| Code Name | Specify a code name of the desired destination. If indicated, the Code field is disabled (and vice versa) |
| Code | Specify a code of the desired destination |
| Code Deck | Select a code deck that will be used for a current dispute |
| Select File | Upload the xDR file for comparison |
| Date Format | Specify date format of xDRs |
| Interval | Specify a time interval of a dispute |
| Override Timezone checkbox | If enabled, the timezone in the imported file will be replaced with the specified timezone in the Period field |
When you fill in all required fields, click the Process>> button.
Please note that by default date format is set to auto and has the following format: YYYY-MM-DD HH:MM:SS.
xDR Disputes have developed optimization algorithms of the file uploading process. Hence, we strongly recommend uploading files with a limited number of columns. The dispute file must contain only 6 columns for correct auto-detection while importing.
Step 2. Rows and columns select
The system will recognize the file and display a few first rows of it. Following this, you need to select these mandatory columns: Src Party ID, Dst Party ID, Volume, Connect Time, Finish Time. Then, click Process>> again.

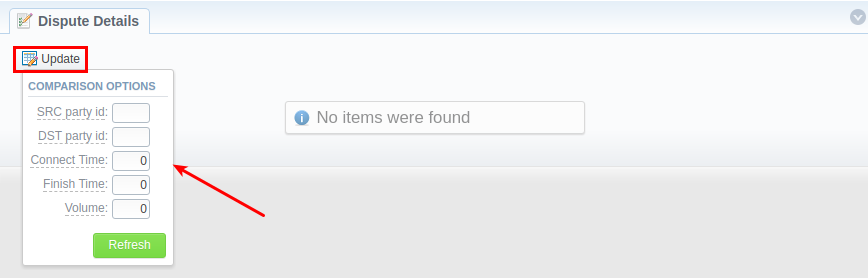
Step 3. Receiving results of comparison
After you click Process>>, the system will execute the comparison of a local xDR and the imported one, and the Dispute Details window will be opened. Then, you need to click the Update button and specify Compare Options in a respective pop-up window. Following this, click the Refresh button for the disputes results to be displayed.
| Field | Description |
|---|---|
| Src Party ID | Enter a number of last digits for source number comparison |
| Dst Party ID | Indicate a number of last digits for destination number comparison |
| Connect Time | Specify the possible time offset (in seconds) between the system and external xDRs |
| Finish Time | Define the possible time offset (in seconds) between the system and external xDRs |
| Volume | Specify the possible time offset (in seconds) between the system and external xDRs |
| Button/Icon | Description |
|---|---|
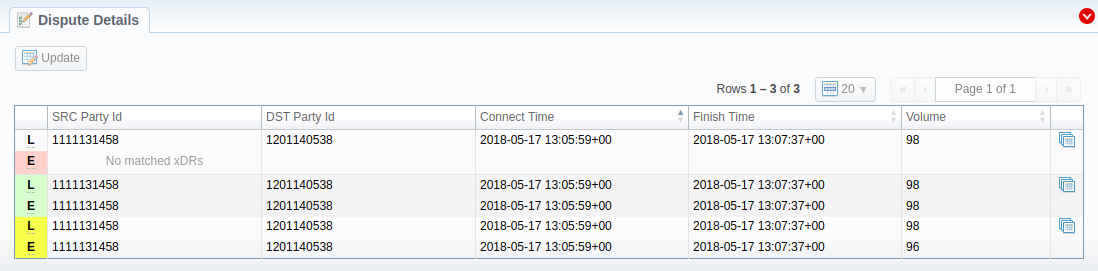
| Red color indicates the mismatched xDRs (external or local, it depends on the marked letter L or E) | |
| Yellow color indicates the matched xDRs with offset (external or local, it depends on the marked letter L or E). For example, the Volume value on a screenshot above for a local xDR is 98 and for external - 96 | |
| Green color indicates the exactly matched xDRs (external or local, it depends on the marked letter L or E) |
Please note, if at least one of the xDR's comparison parameters (Session Time / Connect Time or Session Time / Finish Time) matches the range of values specified in the Update option, it will be indicated as exactly matched xDRs (green color).
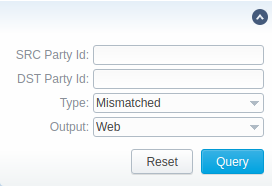
Click on a blue downward arrow in the top right corner of the page to use Advanced Search. Note that by default, dispute details are filtered by the Mismatched type.
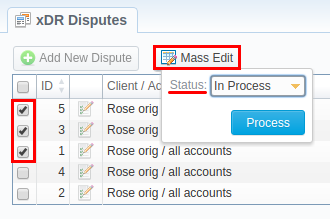
Mass edit
You may change the status of selected disputes by using the Mass Edit button. Simply select target disputes, click the Mass Edit button, choose a status in a respective field and click Process. All changes will be applied immediately.