Provisioning API
This page contains information about Provisioning API as a section of the user interface. For the documentation about Provisioning API as a concept and its usage, please refer to Provisioning API article.
Section overview
The following section allows configuring and monitoring of hooks for Provisioning API.
Provisioning API provides a mechanism for real-time integration with 3rd party systems, including softswitches, gateways, and CRM systems. It calls pre-defined handlers on the occurrence of specific events in the system. For detailed information about Provisioning API functionality, go to the APIs section of our User Guide.
To configure handlers and check their call log, go to the Integration → Provisioning API.

| Column | Description |
|---|---|
| ID | Handler's identification number |
| Priority | Priority of handlers execution |
| Name | Handler's title |
| Event | Description of the handler event |
| Handler | Category of the handler that is used and location. There are two types of handlers that can be used: HTTP scripts, called via POST requests (used in most cases) or local server scripts, called locally on the server (used in very specific cases) |
The list of section functional buttons/icons is as follows:
| Button/Icon | Description |
|---|---|
 | Allows creating a new handler |
 | Identifies a disabled status of a handler |
 | Identifies an enabled status of a handler |
 | Identifies an archived status of a handler |
 | Allows viewing details of a target handlers' performance Execution Logs tab for a respective handler |
 | Allows deleting a handler from the system |
Advanced search
Advanced Search drop-down menu, located in the top right corner of the section, is called to facilitate easy access to required information. By clicking on a red downward arrow icon, the following drop-down menu is displayed:
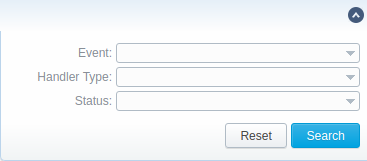
| Field | Description |
|---|---|
| Event | Filter by the event type |
| Handler Type | Filter by the type of the handler |
| Status | Filter by status of the handler |
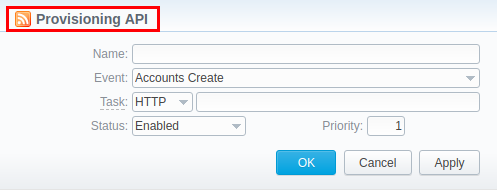
Creating a new handler
To start with provisioning, you need to create a handler manually. Click the New Handler button and specify respective parameters in the appeared pop-up window:
| Field | Description |
|---|---|
| Name | Specify a particular title for a handler |
| Event | Specify an event to be handled |
| Status | Choose the state of the handler: "enabled" - select it to make a handler active; "disabled" - select it to unable a handler; "archived" - select it to archive a handler |
| Priority | Establish an order of handler performing. Note: lower values have higher priority |
To put a handler into action, you need to wait for about 5 minutes till the next execution of the Cache Manager service.
Execution logs tab
You can access the details about handler execution in this tab. For more details, check out a related article: Execution Logs.