Microsoft mailbox as a data source for ERM [OAuth 2]
The process is divided into 3 dependent parts:
- Creating the Microsoft Azure App
- Authentication through Terminal
- Creating the Data Source in JeraSoft Billing
Creating the Microsoft Azure App
-
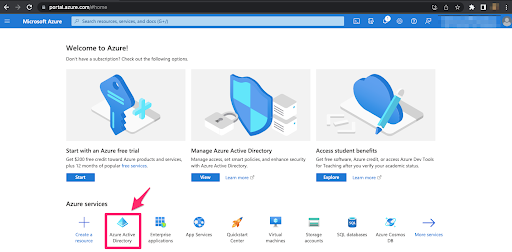
Login to Azure Portal with your Microsoft credentials, and go to Azure Active Directory.
-
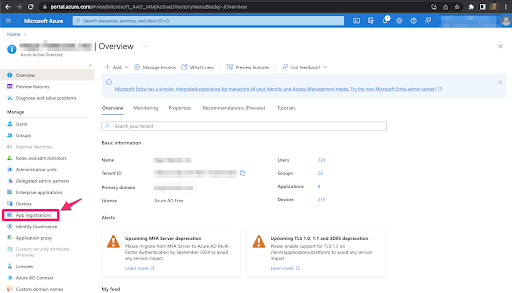
Go to the App Registrations page.
-
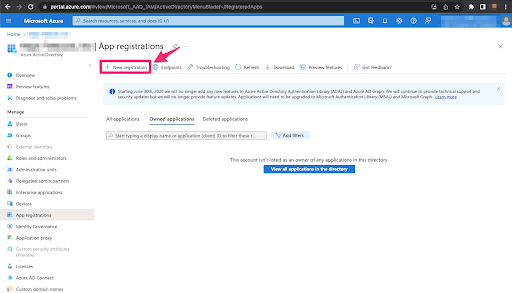
Click the New Registration button.
-
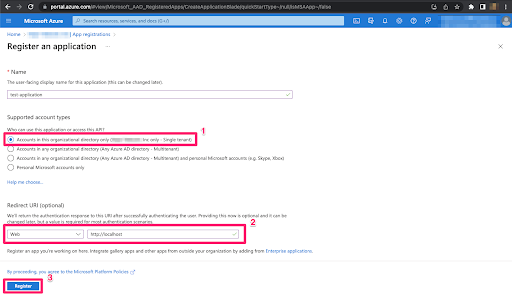
Register a new application using the settings from the screenshot below:
-
Save the Application (client) ID and Directory (tenant) ID values from the Overview tab of the freshly created app.
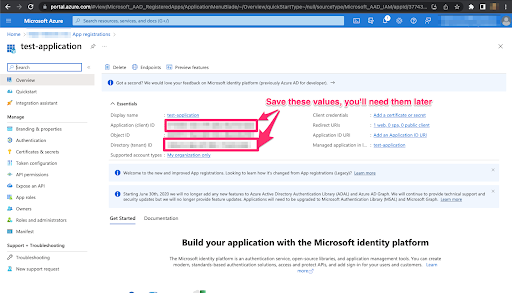
-
Allow public client flows from the Authentication tab of your application:
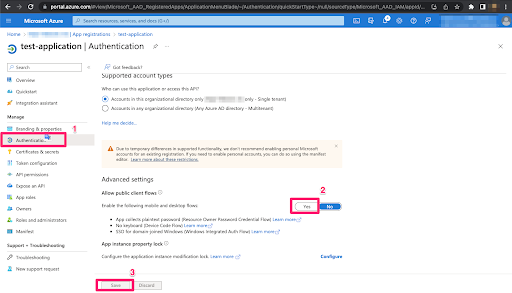
-
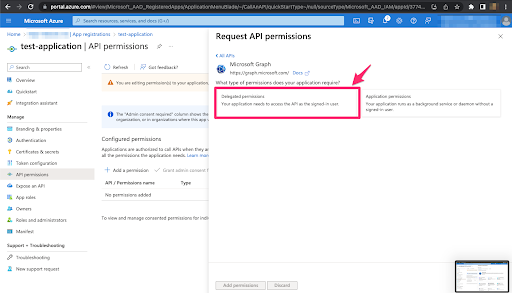
Now, you have to add some permissions to your application - it should be
IMAP.AccessAsUser.All(to be able to login to your mailbox) andoffline_access(to be able to refresh token on Email Rates Manager’s demand).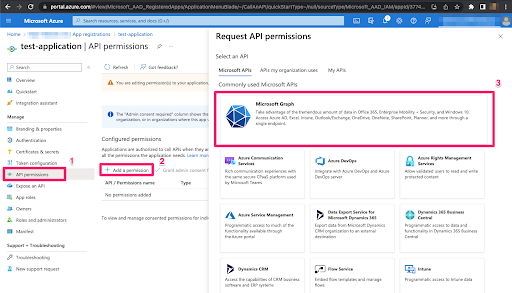
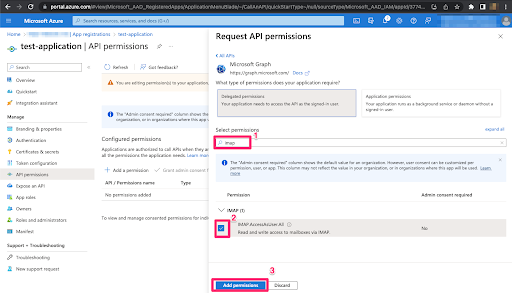
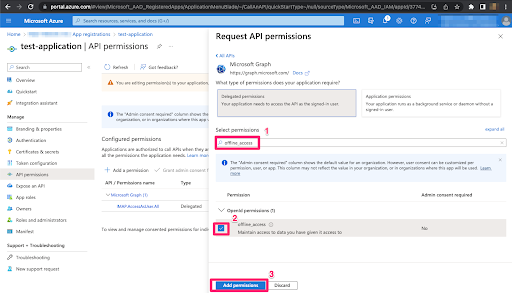
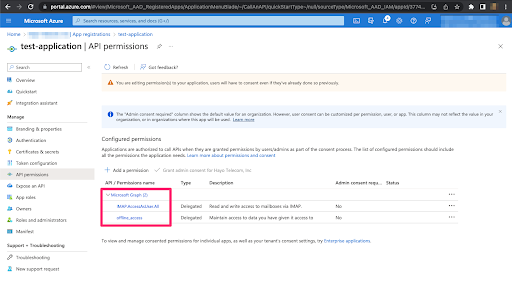
As a result, you should have 2 permissions added to your application:
Authentication through Terminal
- Download the obtain_refresh_token.py script to your computer.
- Open the terminal, go to the directory where the downloaded script is located (using
cdcommand), and execute the following command, which will install the needed for authentication python package:
pip3 install msal
- Next, run the script itself using the following command:
python3 obtain_refresh_token.py <CLIENT_ID> <TENANT_ID>
where CLIENT_ID is an Application (Client) ID, TENANT_ID - Directory (Tenant) ID. You obtained these values during the previous steps.
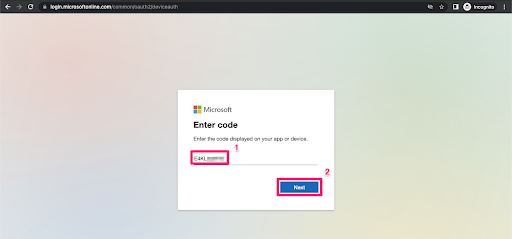
As a result, you should see the message like in the screenshot below. Go to Microsoft device login and enter the code you see in the terminal. Next, go through the authentication process and grant the required permission to the application.
WARNING: Do not close the terminal during the authentication process.

-
If the authentication process was completed successfully, you will see the "success" message in the terminal. Please save the
refresh_tokenvalue. You will need it to create the Data Source in JeraSoft Billing later.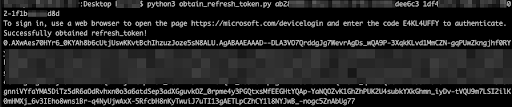
Creating the Data Source in JeraSoft Billing
- Log in to JeraSoft Billing, open Integration → Data Sources tab, and click the Add Source button;
- Choose the "IMAP Microsoft [OAuth2]" connection type and fill in the Name, Login, Client ID, Tenant ID, and Refresh Token fields. The Host field is pre-filled with the "outlook.office365.com" value, and you should not change it.
- Click Apply.
Once the steps above are completed, you can choose the freshly created Data Source as a source for Automatic Email Import in the Rate Tables settings.