Avalara tax integration routines
This article will address the needed actions for establishing and testing the tax application process through the JeraSoft Billing integration with the Avalara tax engine. For a more detailed field-by-field explanation, please refer to the respective User Guide page on Taxes Profiles.
Preconditions
For a workable scheme, you need the Avalara Tax product. The following steps will explain how to enable integration between JeraSoft Billing and Avalara Tax Compliance Software.
Step 1: Adding an Avalara Taxes Profile to your system
In the Configuration → Taxes Profiles section, click the New Taxes Profile button to start creation. The Type should be "Avalara", which will open a range of configuration possibilities. You will be able to set up and customize the following details:
- Avalara credentials
- your company information
- mapping of Services, Packages, and Extra Charges to Avalara Transaction / Service Pairs
- Tax Exemptions
Please refer to the User Guide for a field-by-field explanation.
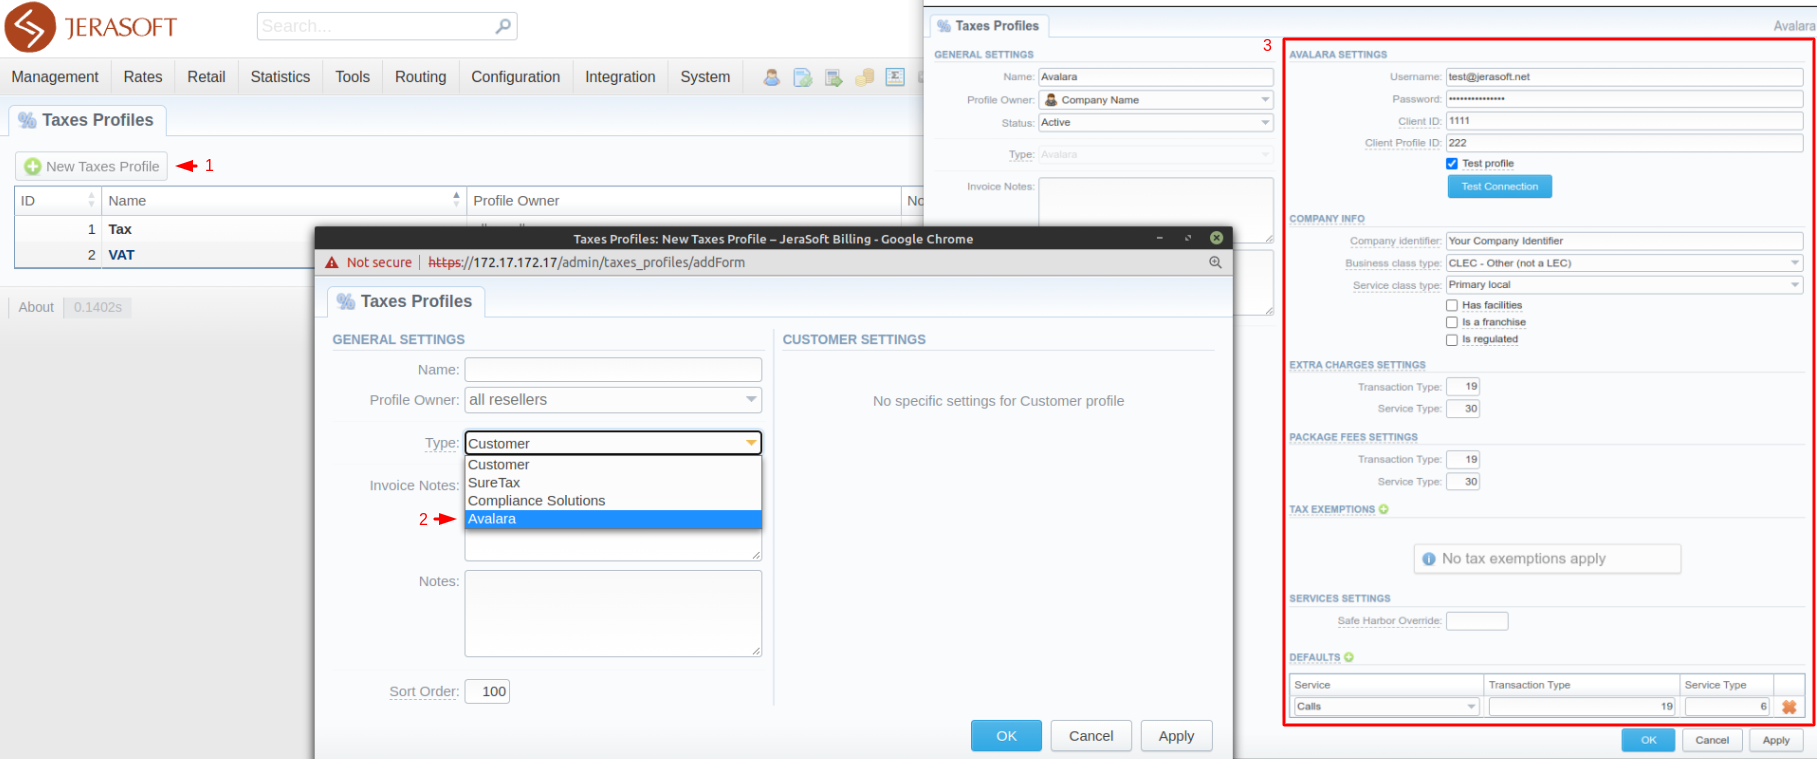
Please make sure all the necessary settings are in place before hitting "OK" or "Apply".
Step 2: Testing the integration
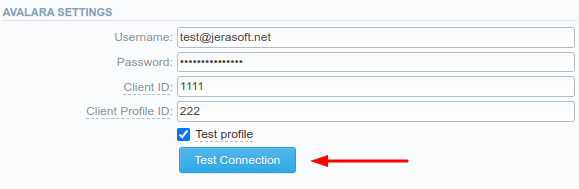
From your JeraSoft Billing system, there is a possibility to check the connection to Avalara software with current credentials before even going live with the tax application. For this, click Test Connection under Avalara Settings in the profile edit form:
Step 3: Assigning a Taxes Profile to a Client
After everything is properly configured, you can go ahead and assign a Taxes Profile to a Client in the system. You can do that while in the Client's configuration form under the Edit tab:
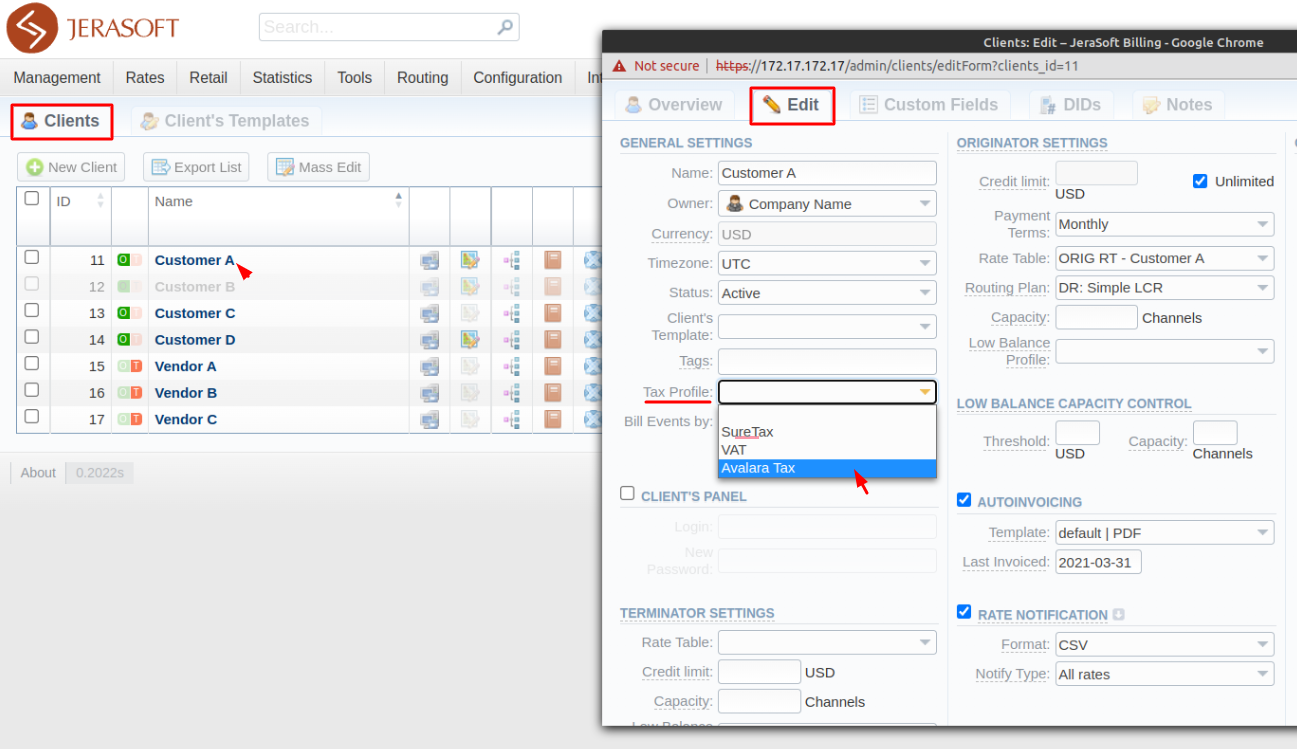
There is also a possibility to operate with certain extra taxes-related settings on a Client level. The full list is as follows (with default values in brackets):
- PCode
- Sale Type (1 - Retail)
- Customer Type (1 - Business Type)
- Lifeline ("false")
- Incorporated ("true")
- Customer reference (
client_name)
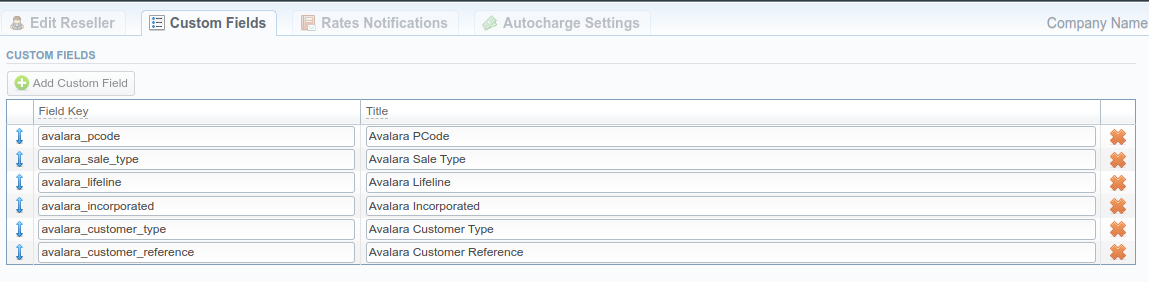
The only mandatory field to use for correct processing here is the first one - PCode. You can set it up under the Custom Fields tab in the Client's form. The Custom Fields themselves are preconfigured on an Owner level.

Setting up Custom Fields makes it easier to manage customer-specific data that affects taxation, like their location, type, etc.
Step 4: Creating an Invoice
When the bill run comes, and the Invoices are created (either manually or automatically), the taxation data will be pulled from the Avalara software to be represented in a generated Invoice.
Please ensure that your Invoice Template in use has the variables from Custom Taxes table in it for correct processing.
Deleting an Invoice
If certain business flows require Invoice deletion, voiding, or reissuing, the taxes pulled from Avalara will be in sync with that. That means if you delete an Invoice that was generated with taxes from Avalara, the Invoicing Manager service sends a request to delete the corresponding transactions in the Avalara system. There are two cases how it will happen:
- If you delete an Invoice created in the current month, we send an Uncommit request is sent to Avalara to delete the corresponding transaction;
- If you delete an Invoice that was NOT created in the current month, then it is no longer possible to delete the transaction, as it is submitted to the reporting. Therefore, we send a special Adjustment Request to Avalara.