Docs for all releases
This documentation relates to an earlier version of JeraSoft VCS.
View User Guide 3.26 or visit our current documentation home page.
View User Guide 3.26 or visit our current documentation home page.
In this article
Section overview
Call Shops section allows you to create and manage call shops networks. Each call shop is a RADIUS-based customer. That's why for correct work of Call Shops section, RADIUS must be enabled. Section consists of all existing call shops, each containing such details as name, balance, rate table, etc (see screenshot below).
Screenshot: Call Shops section main window

Advanced Search
In the top right corner of the section above the table, the Advanced Search drop-down menu is located. To filter section data, fill in the following drop-down menu and press Search:
Screenshot: Advanced Search drop-down menu

Creating New Call Shop
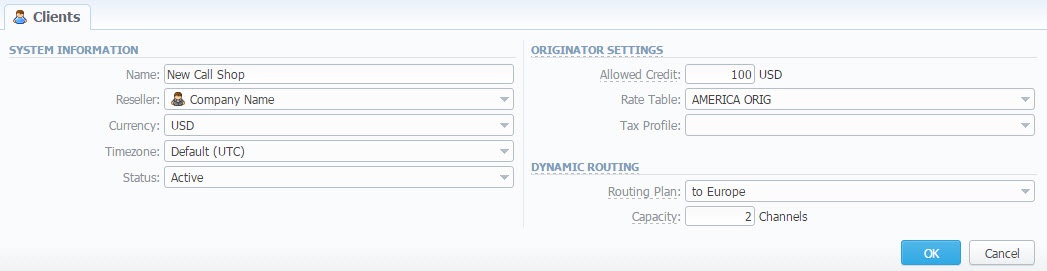
To create a new call shop, press New Call Shop button and fill in the following details in a pop-up window:
Screenshot: Creating new call shop / Clients form
| Field | Description |
|---|---|
| Name | Enter name for call shop |
| Reseller | Select a reseller that will be an owner of this call shop |
| Currency | Specify preferred currency |
| Timezone | Choose preferred timezone |
| Status | Select a status for this call shop:
|
| Allowed Credit | Specify credit value here |
| Rate Table | Choose a rate table this call shop will be using |
| Tax Profile | Specify a Tax Profile this call shop will be using |
| Routing Plan | Select a routing plan, if you wish to use dynamic routing for this call shop |
| Capacity | You can limit origination capacity for this call shop in this field |
When all information is entered, press OK and call shop will appear on the list.
Steps to activate a call shop
When a call shop is created, you will be forwarded to Accounts section. In order to activate a call shop, you need to follow these steps:
- In Accounts section, create an account for your call shop's account. Specify a rate table ihere, if you didn't indicate it in call shop's settings.
- Return to the Call Shops section. Your call shop will be marked as Ready. To proceed, click on its name.
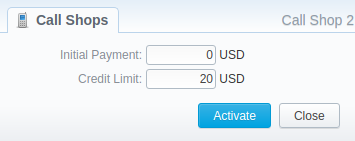
- Fill in the respective form (see screenshot below) and click the Activate button. Now, your call shop is ready.
Screenshot: Call shop settings
Interval Reload
Also, you may set an interval for call shops list reloading. To do this, click the Reload Interval button and select the value from the drop-down list.
![]() Attention
Attention
Please note, that Calculator tool must be in a real time mode for correct Call Shops work.
Finalize/Reactivate Call Shop
According to your demands, you can change an active period of the call shop.
Therefore, you may finish the call shop activities by clicking on Finalise button. Or you can activate once again the same call shop when it's over by pressing the Reactivate button on the toolbar.
To open the window with respective settings, click on the name of the call shop when it's already activated.
Screenshot: Call Shop settings
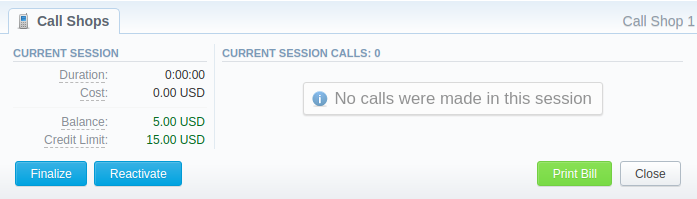
Also, you can print the bill of the following call shop by using the Print Bill button. To close the window, press respective button.
Overview
Content Tools