Docs for all releases
This documentation relates to an earlier version of JeraSoft VCS.
View User Guide 3.26 or visit our current documentation home page.
View User Guide 3.26 or visit our current documentation home page.
In this article
Section overview
Code deck is a list of destination codes, each with its corresponding name and country it represents (optional). Code deck is by far one of the key elements of any Rate Table and is used pretty much throughout the whole system (sections like Invoices, Packages, LCR Lists, and so on). By having multiple code decks, you can freely operate with different names for same codes and change them in the real time.
Section is presented in a form of a list of all existing code decks in the system. The table of code decks consists of the following columns:
Screenshot: Code Decks section

| Column | Description | |
|---|---|---|
| ID | Code deck's identification number | |
| Deck Name | Name of a code deck | |
| Reseller | List of resellers corresponding deck was assigned to | |
| Codes | Total number of codes presented in the deck | |
Functional buttons/icons, presented in the section, are as follows:
| Button/Icon | Description | |
|---|---|---|
| Allows to create a new code deck | |
| Allows to manage an existing code deck on a list | |
| Allows to delete a code deck from the system. Requires confirmation | |
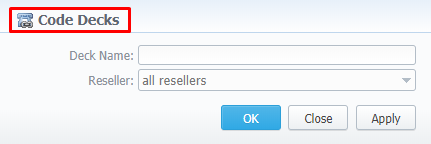
Creating New Code Deck
To create a new code deck:
- Click New Code Deck button
- Fill in all required fields of a pop-up window (see screenshot below)
- Press OK
Subsequently, a new code deck will be added to the general list in the section.
Screenshot: Code Deck pop-up window
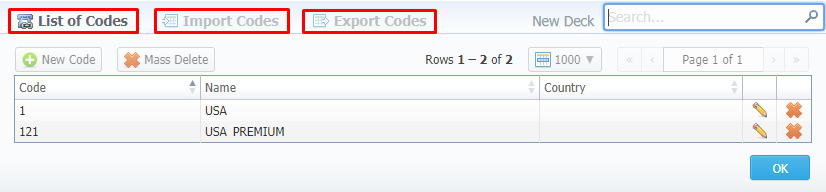
Managing Code Decks
In order to manage your code deck, left-click on the deck's name or  edit icon opposite the deck on the right. The opened pop-up window consists of 3 tabs: List of Codes, Import Codes and Export Codes (see screenshot), where you can perform operations pointed out below.
Screenshot: Code deck's tabs
Adding Codes
In List of Codes tab, click on New Code button to add a code group to your deck. The pop-up window contains the following parameters (see screenshot below):
Screenshot: Adding new codes
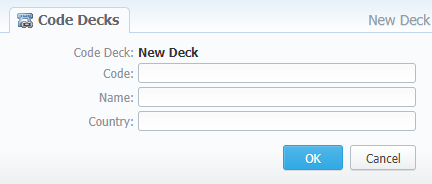
| Field | Description |
|---|---|
| Code Deck | Name of the code deck. Autofilled by the system |
| Code | New destination code |
| Code Name | Displayed name of a code group |
| Country | Country the codes in current group will belong to |
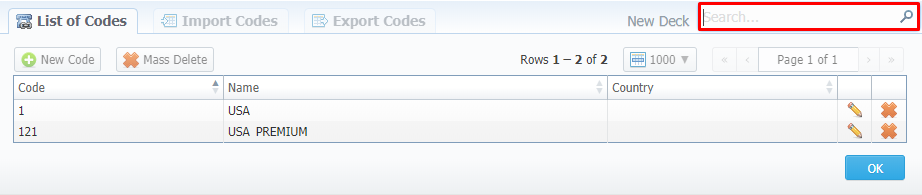
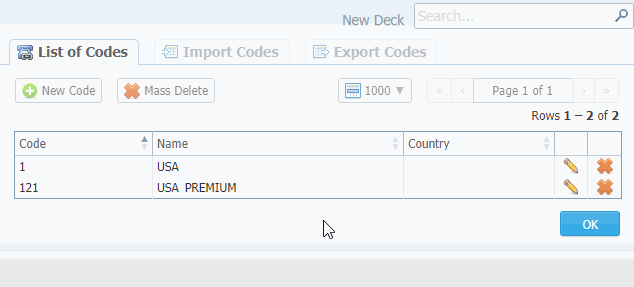
To manage navigation between thousands of codes on the list, you can always look for the necessary code using a Search box (see screenshot).
Screenshot: Section searchbox
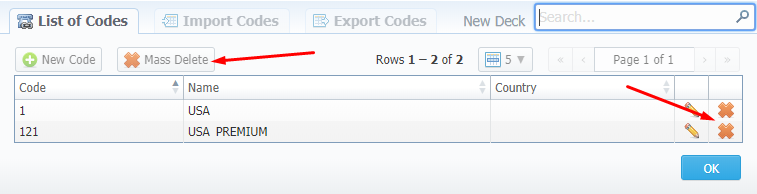
Deleting Codes
You can either delete each code separately by pressing ![]() delete icon opposite corresponding code on the list or delete all codes at once by pressing Mass Delete button (see screenshot below).
delete icon opposite corresponding code on the list or delete all codes at once by pressing Mass Delete button (see screenshot below).
Screenshot: Codes deletion
To verify mass deletion, press OK button in a pop up window (see animation below).
Animation: Codes deletion
Importing Codes
Not only can you add codes to the lists manually, but also import them from a file. The whole import process can be logically divided into two steps:
The first step is to go to the Import Codes tab (screenshot below) and fill in the required fields. After selecting a file and specifying all additional fields, click on Process>> button.
Screenshot: Import Codes - Step 1

| Section | Field | Description |
|---|---|---|
| File Process | Select file to import | Select an import file by pressing Choose File button |
| Fields delimeter | Specify here a delimiter symbol. Possible options are:
By default, Autodetect option is chosen. | |
| Import Process | Deck update mode | Specify the code deck update mode. There are three possible modes:
By default, Import all codes (update existing) mode is chosen. |
| On errors | Define what to do if an inconsistency or error was found in importing file:
By default, Import correct rows and show all found errors option is chosen. |
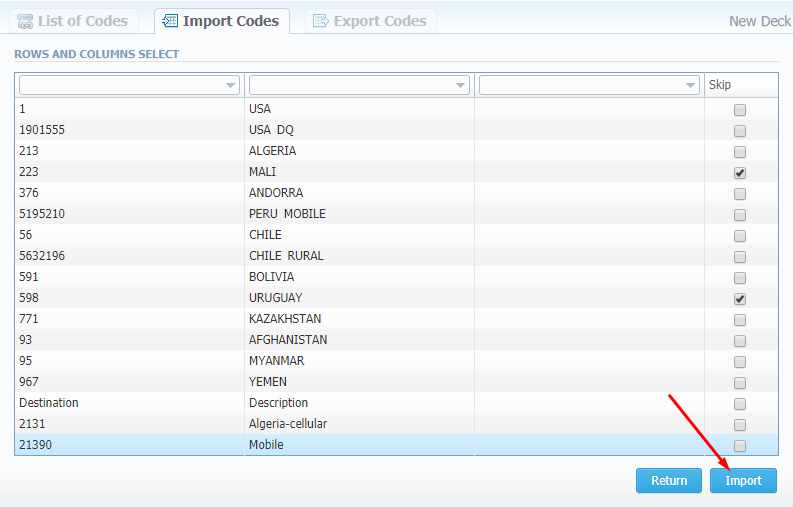
During the second step, system will recognize the file and display first 17 rows. Then, you need to select the header for each column. In case you don't need some rows, you can easily skip them by checking boxes opposite unnecessary rows in Skip column (see screenshot). To abort imorting process, click on Return button, and you will be redirected to Import Codes tab. To finish importing, click on Import button (see screenshot).
Screenshot: Import Codes - Step 2
After you click on Import button, the system will start importing process. When the progress bar reaches 100%, your import is done. Congrats!
See what happens if your file contains Country Code column.
Exporting Codes
This feature allows you to export a content of a code deck to a file. To initiate export, do the following:
- Go to Export Codes tab (screenshot down below)
- Specify delimiter symbol in Fields delimiter field and first CSV file row as a title row by marking With headers row checkbox (optional).
- Click OK, and a CSV file will be downloaded to your computer.
Screenshot: Export Codes tab

Overview
Content Tools