Docs for all releases
This documentation relates to an earlier version of JeraSoft VCS.
View User Guide 3.26 or visit our current documentation home page.
View User Guide 3.26 or visit our current documentation home page.
In this article
Section overview
This section allows to create the DID numbers, which may be later assigned to one of the packages and finally provided to a customer under Package terms. Section consists of two tabs:
- DID Management;
- Operators.
DID Management Tab
Tab contains a list of all existing DID(s) and is presented in a form of table with the following columns:
Screenshot: DID Management section
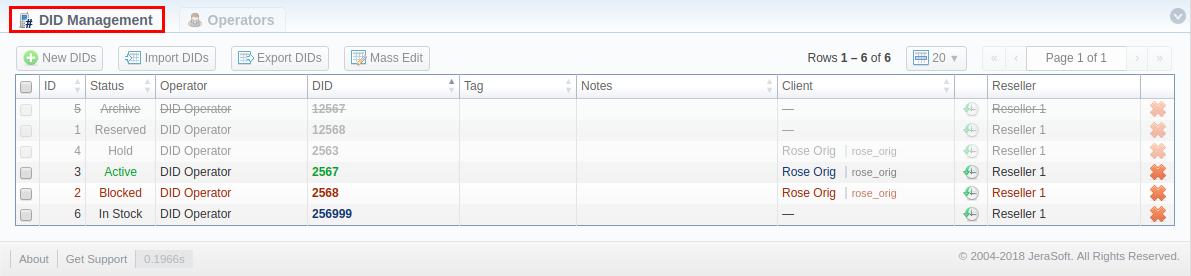
| Column | Description | |
|---|---|---|
| ID | ID of current DID number | |
| Status | Status of a current DID number | |
| DID is in use by a customer | |
| DID is in stock and available for usage | |
| DID is temporarily not available for usage | |
| DID is not used but at the same time not available for purchase yet | |
| DID is on hold after usage | |
| DID is not used and not available anymore | |
| Operator | Current DID's operator, an owner of a current DID number | |
| DID | Current DID number | |
| Tag | Specify the tag for respective DID number you would like to be tagged in the future | |
| Notes | Additional information about certain DID | |
| Client | Shows client and account, which current DID belongs to | |
| Reseller | Name of reseller, under which respective DID's operator was created | |
Functional buttons, presented in the tab are as follows:
| Button/Icon | Description | |
|---|---|---|
| Allows creating new DID(s) | |
| Allows imporing DID(s) from .csv or .xls files | |
| Allows exporting currently displayed DID(s) in a .csv file | |
| Allows editing selected DID(s). | |
| Allows viewing history of DID changes in Audit Log section | |
| Allows deleting DID from the system | |
![]() Attention
Attention
When a package with assigned DID number is not active, this DID number will be in Hold status and routing destination is unreachable.
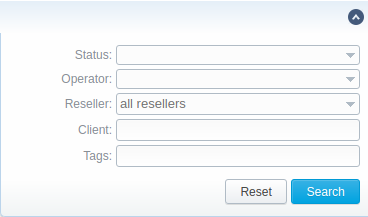
Advanced Search
In the top right corner of the section above the table, the Advanced Search drop-down menu is located. To filter section data, fill in the following drop-down menu and press Search:
Screenshot: Advanced Search drop-down menu
Сreating DID Number
The whole process of creating DID number can be described in few steps:
Go to Retail > DID Management > Operators tab. Create one or more operators (DID providers).
Open the DID Management tab, add one or more DID numbers.
Make sure that these DIDs have In Stock status. You can also use the Import DID's button.Field Description DID(s) Indicate one or multiple DID numbers
 Tip
TipAlso, you can set the range of DID numbers here.
Specify the range using the upper and lower numbers and the dash (-) to separate them, for example, 111-222. Therefore, the system will create a range of DIDs from 111 to 222 (included).Operator Specify a target DID provider Status Choose one of the status DID(s) can acquire: - Reserved
- In Stock
- Archive
After Hold Define what status DID is going to acquire after being in Hold status. Hold status is acquired after Package, this DID is assigned to, is deactivated Tag Specify an additional tag for better division of DIDs in certain groups. Useful when clients have multiple DIDs Notes Define additional info regading DID(s) Go to Retail > Packages section. Create a package a number of allowed DID's to be picked from will be specified.
Assign respective Package to a target customer in the Client Packages section.
Open the DIDs tab in the target client settings. Here, pick one or more DID numbers to assign.
For more details, look through the How to configure DIDs scheme article in our Knowledge Base.
This will effectively assign a DID number to one of the customer's accounts. Please note, this functionality is very switch dependent, and additional development or testing may be required. Please contact JeraSoft Support team for help, if you have any doubts or questions.
We recommend using tags to make navigation between a great deal of DIDs easier and more effective.
Mass Edit of DIDs
You can easily change the status of multiple selected DIDs, specify tags and number of hold days using the Mass Edit button. To do so, you need to select DIDs (for which the status must be changed), then press Mass Edit button and in a pop-up window specify the status from the drop-down list in a respective Set Status to field, click on the Update button for confirming the change. Also, using the Mass Edit button you can add a tag and notes. If you press the Delete button only selected DIDs will be deleted.
Screenshot: Mass Edit window

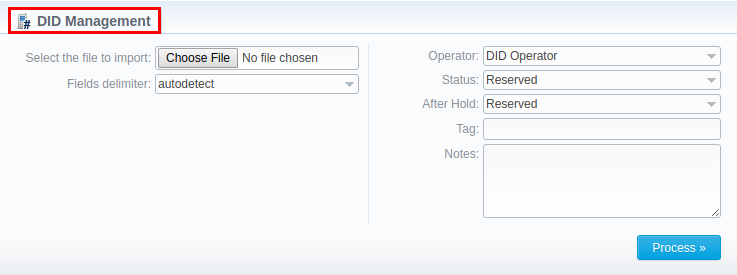
DIDs Importing
The process of DIDs importing is pretty simple:
- Click on Import DIDs button which in the section
- In a pop-up window, you need to attach a .csv file you wish to be imported and fill in respective fields (see screenshot below)
- Press Process>> button
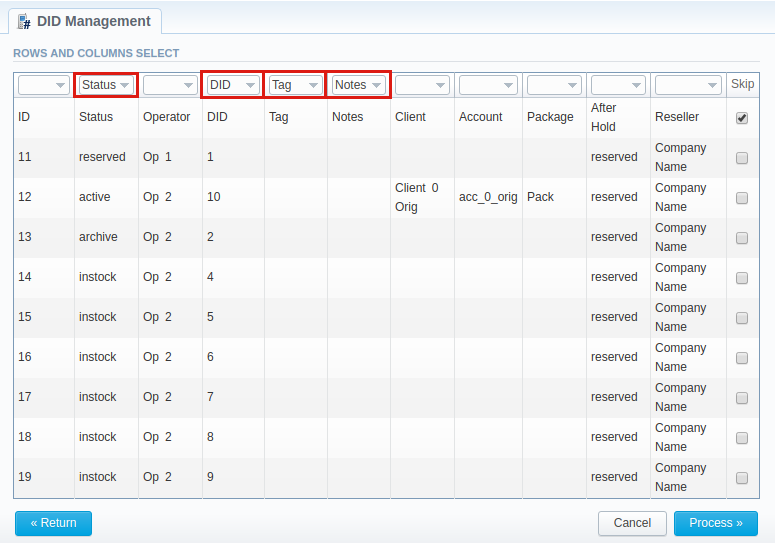
- Specify columns name from a select drop-down list (see sreenshot) and once again press Process>> button
- All imported DIDs will be displayed in a section table
Screenshot: Importing DIDs
Screenshot: Rows and Columns Select
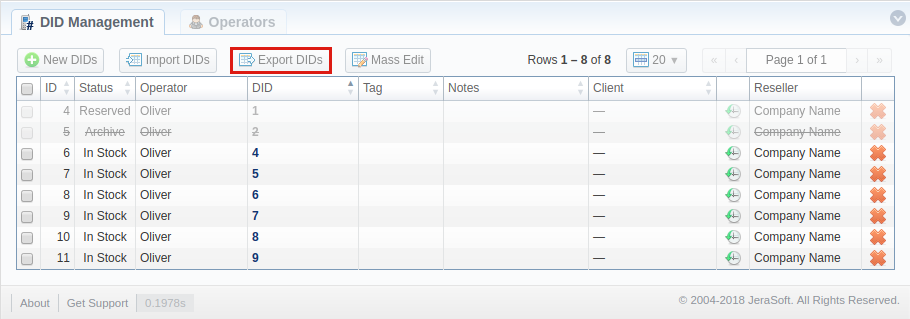
DIDs Exporting
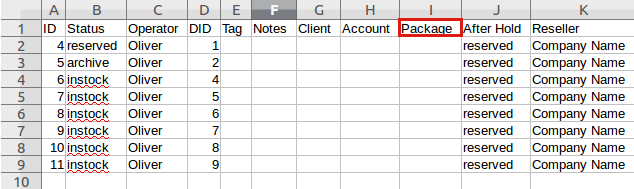
DIDs export allows a user to download a .csv file that contains information that is currently displayed in a section table. Apart from all the the columns of section table, the file contains an extra Package column, where respective package name, if any of the DIDs is assinged to the package, will be displayed (see screenshots below).
Screenshot: Export DIDs button
Screenshot: Package column in exported file
Operators tab
This section shows the list of operators who are owners of DID numbers. Tab is presented in a form of a table with the following columns (see screenshot below):
Screenshot: Operators tab

| Column | Description |
|---|---|
| ID | ID of a operator |
| Name | Operator's name |
| DID's count | The amount of DID numbers owned by the current operator |
| Reseller | Current operators' reseller |
The functional button/icons in the tab are:
| Button/Icon | Description |
|---|---|
Allows creating new operator | |
| Allows filtering DID numbers in DID Management tab by a target operator |
| Allows deleting a respective operator |


You can filter tab data by Resellers using Advanced Search in the top right corner of the page.
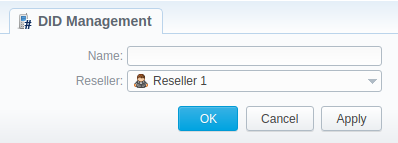
Сreating New Operator
To add a new operator, click on the New Operator button and in the pop-up window specify an operator's name and target reselle . Then, press OK for confirmation.
Screenshot: New Operator creation form
Overview
Content Tools