This section allows to manage and specify access rights for all sections of the system. In the section, you can create new roles, as well as edit permissions of already existing ones. By default, there are 4 pre-installed roles:
Administrator – this role has unlimited rights and access permissions in the system;
Monitoring – this role has basic access permissions to work in the system that include viewing clients lists and summary reports, work with Factors Watcher, etc. However, the role doesn't stipulate for access to technical settings and some statistic info that is only available to Administrator;
Resellers – this role has advanced access permissions for a complete work with the clients. User with this role also doesn't have access to technical settings and some statistic info that is only available to Administrator (use this role when adding Reseller or Agent user).
API - Client Portal - this role has been created to simplify user's access to Client Portal and has next to none permissions for work inside JeraSoft Billing.
Screenshot: Roles section

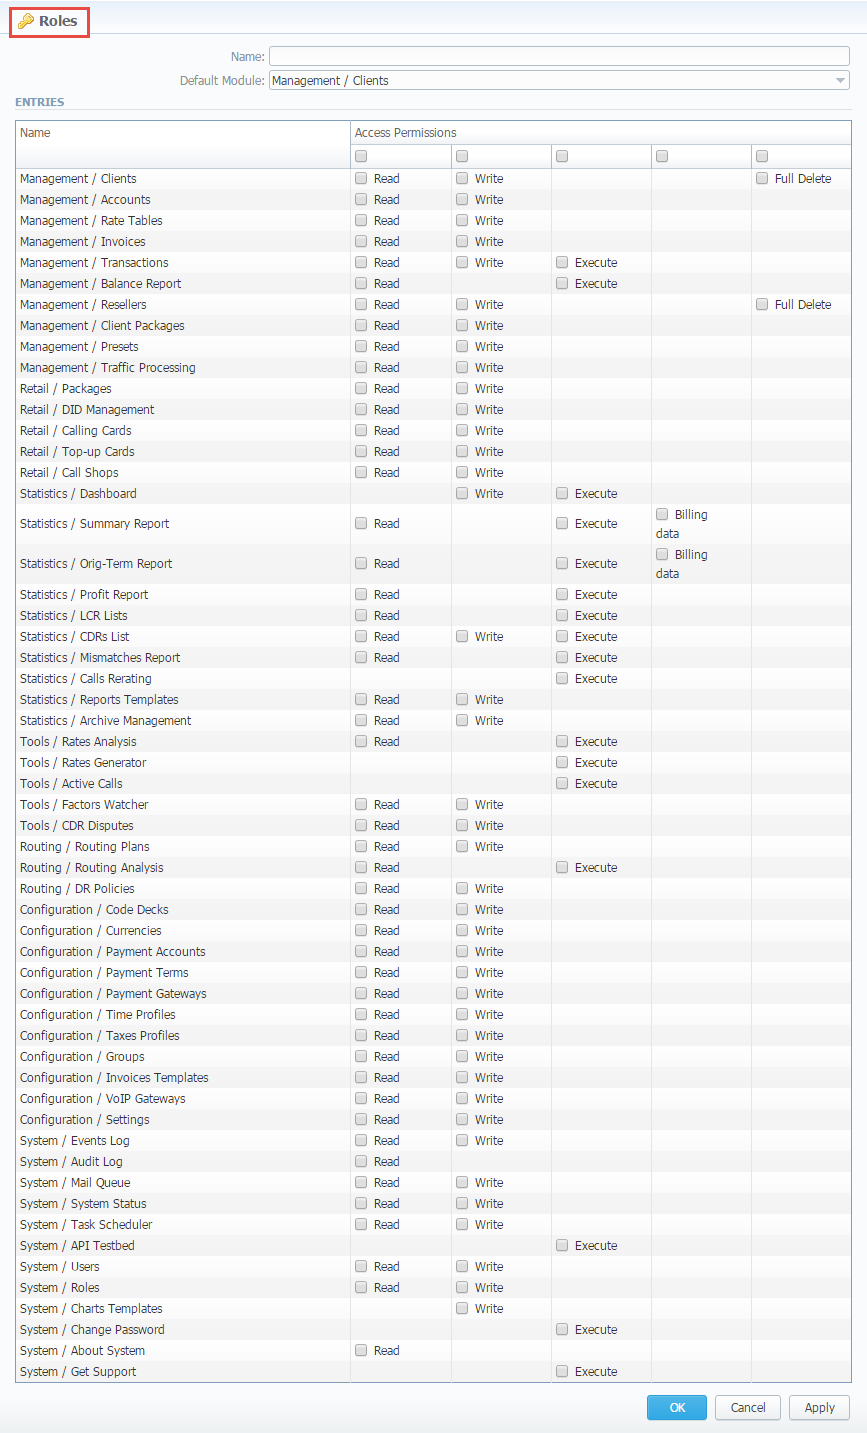
To add a new role, click the New Role button on the toolbar. A pop-up window with role settings will appear, where you need to enter the name, choose the default module and select respective access rights in the Entries table. The Default Module field specifies a default section that will be displayed when you log in the system.
Note that a created user can assign the role with respective permissions. Therefore, if the user has access to create roles, he can assign the role with permission similar to his own or less.
Screenshot: Adding a new role window

| Checkbox | Description |
|---|---|
| Read | Allows/forbids a user to view information presented in a section |
| Write | Allows/forbids a user to create, edit, and delete information presented in a section |
| Execute | Allows/forbids a user to execute system services in a section |
| Full Delete | Allows/forbids a user to perform full deletion of entities in a section |
| Billing Data | Allows/forbids a user to work billing data (rates, profit, taxes, etc.) in a section |
|