Docs for all releases
Page History
| Panel | ||
|---|---|---|
| ||
|
Section overview
...
Provisioning API provides a mechanism for a real-time integration with 3rd party systems, including softswitches, gateways, and CRM systems. It calls pre-defined handlers on an occurrence of specific events in the system. The handlers are allowed to modify data, forbid or allow the action or simply process given event.
...
Screenshot: Provisioning section

| Column Name | Description | |
|---|---|---|
| ID | Handler's identification number | |
| Priority | Priority of handlers execution | |
| Name | Handler's title | |
| Event | Description of the handler event | |
| Handler | Category of the handler that is used and location. There are two types of handlers that can be used:
| |
The list of section functional buttons/icons is as follows:
| Button/Icon | Description | |
|---|---|---|
| Allows creating a new handler | |
| Identifies a disabled status of a handler | |
| Identifies an enabled status of a handler | |
| Identifies an archived status of a handler | |
| Allows viewing details of a target handlers' performance Execution Logs tab for a respective handler | |
| Allows deleting a handler from the system | |


...
| Panel | ||||||||
|---|---|---|---|---|---|---|---|---|
| ||||||||
For a quick switch between enabled and disabled statuses, click on a respective status icon in the section. However, to change archived status, you need to do it from a hander handler edit form |
Advanced Search
Advanced Search drop-down menu, located in the top right corner of the section, is called to facilitate an easy access to required information. By clicking on on a downwards arrow ![]() icon, the following drop-down menu is displayed:
icon, the following drop-down menu is displayed:
Screenshot: Advanced Search drop-down menu
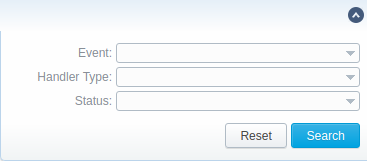
| Field | Description | |
|---|---|---|
| Event | Select from a list of all possible handler events | |
| Handler Type | Indicate a type of handler:
| |
| Status | Choose a target status:
| |
or leave this field blank. In this case, both enabled and disabled handlers will be displayed. This field is empty by default |
Creating a New Handler
To start with provisioning, you need to create a handler manually. Press Click the New Handler button and specify respective parameters of in the appeared pop-up window:
Screenshot: Provisioning section/Handler adding form
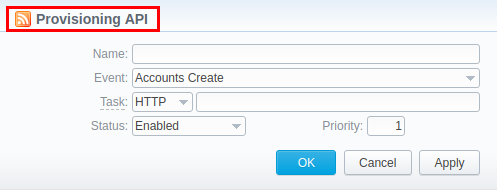
| Field | Description | |
|---|---|---|
Name | Specify a particular title for a handler | |
| Event | Specify a handler event from the following list: | |
Clients |
| |
| Accounts |
| |
| Clients Packages |
| |
Task | Determine a type of handler and details:
| |
Status | Choose the state of the handler:
| |
Priority | Establish an order of handler performing. | |
| Panel | ||||||
|---|---|---|---|---|---|---|
| ||||||
In VCS 3.17.0, to prevent performance degradation and data inconsistency, affected by external side, Before event type has been removed from the section. |
...
| Panel | ||||||||
|---|---|---|---|---|---|---|---|---|
| ||||||||
Here there There is an example based on http://handler usage. 2. Open the Provisioning section and start to create creating a handler.
Find below an example of the http://handler below:
|
...
| Panel | ||||||
|---|---|---|---|---|---|---|
| ||||||
In order to To put handler into action, you need to restart Cache Manager. To do so, click on corresponding icon in Task Scheduler section |
...
Overview
Content Tools